


In simple words, localization is the customization of applications for a given culture or locale. If you have been doing ASP.NET development, you probably are already familiar with localizing applications.
Step 1: Create a new Silverlight project and call it ‘SliverlightLocalize’. Drag and drop a textbox from the Toolbox to the Silverlight designer.
Step 2: Right click your Silverlight project > Add > New Item > Select ‘Resources File’ and rename it as localstring.resx. In the resource file, add a Name and Value as shown below
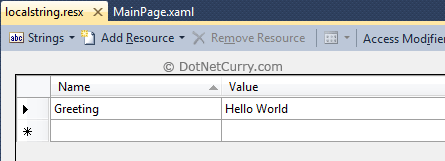
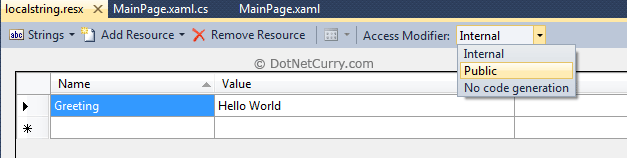
Also make sure the access modifier combo box says ‘Public’.
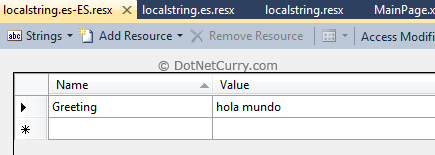
Step 3: Let us add support for the Spanish language in our application. Make a copy of this resource file by copying it from the project in the Solution Explorer and pasting it back ‘twice’ inside the project. Rename it to localstring.es.resx and localstring.es-ES.resx. What we have done is created an invariant resource file (es), as well as a culture-specific resource file(es-ES). This is a good practice often referred to as the fallback culture practice and you should adopt this for every language/culture you support.
Now type the Spanish translation for Hello World in both the files as shown below
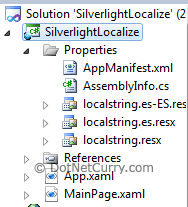
Step 4: Copy all the three resource files in the Properties folder of your project (you can also use a separate folder). The structure should look similar to the following
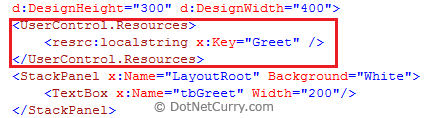
Step 5: Now that the resource files are set, let us bring them to use. Open MainPage.xaml (where you added the textbox) and add a namespace that points to the local namespace of the resource file.

Now use the localized resource string as a static resource
Now write the following mark up in the TextBox control to data-bind to the static resource

Step 6: If you are an ASP.NET developer, you may be tempted to run the application since you have done all that’s needed to localize the application. However in Silverlight, there are some additional steps. You need to update your Silverlight project to set the <SupportedCultures> attribute. Right click on the project and choose ‘Unload project’. Right click the project again and choose ‘Edit SilverlightLocalize.csproj’. This brings up the metadata. Look for the <SupportedCultures> tag and add modify it to add the Spanish culture to it.

READ MORE >>


0 comments:
Post a Comment