


In this article we will explore the importance of the Serialization and it's attributes. For basic example on how to create dot net remoting read the previous article on dot net remoting. Here, we will explore the serialization by creating two-console application one for the server and the other one is for the client.
2. IPurchase Interface for Server
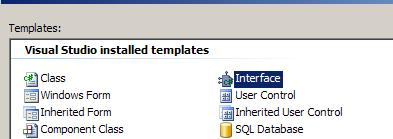
First start a console application and then provide reference to the System.Runtime.Remoting reference to your application. Once this is done, right click the project and select the Add|New Item from the context menu. Select the interface Icon, name the file as IPurchase.cs and click ok.
Add the following piece of code:
//Server_001: Interface on the Serverpublic interface IPurchase{
PurchaseInfo GetPurchaseInfo();
}
PurchaseInfo GetPurchaseInfo();
}
Here, the interface has a function called GetPurchaseInfo, which return an object PurchaseInfo to the caller. The purchase that we will implement is a serializable object. Also we will set some attributes to it, which we will see later when we implement it. The remote object will implement this interface. So we have three parts. An interface, implemented by the remote object returns the serialized object to the remote client.
3. The PurchaseRem remote class for Server
Now add a class PurchaseRem to your Server project. This class is derived from MarshalByRefObject as well as the previously created interface. The implemented interface function just creates an object ofPurchaseInfo and returns it back to the remote client. Below is the code for it:
//Server_002: Remote object on the Server side.
public class PurchaseRem : MarshalByRefObject , IPurchase
{
//Server_003: Constructor
public PurchaseRem()
{
Console.WriteLine("Remote Object Created");
}
//Server_004: Implement the IPurchase Contract.
public PurchaseInfo GetPurchaseInfo()
{
return new PurchaseInfo();
}
}
4. Hosting the remote object on Server
I will cover implementing the PurchaseInfo class in the next section. Before that we will go ahead and host our remote object on the server. This portion also already explained in the previous article and I do not want to repeat everything here once again.
Below is the code for required namespace inclusion:
//Server_005: Remoting Namespaces required for the Server
using System.Runtime;
using System.Runtime.Remoting;
using System.Runtime.Remoting.Channels;
using System.Runtime.Remoting.Channels.Tcp;
The code below registers the remote object and waits for servicing the client:
//Server_006: Allocate the TCP channel 12000
TcpServerChannel channel = new TcpServerChannel(12000);
ChannelServices.RegisterChannel(channel, false);
//Server_007: Register the class that implements IPurchase
RemotingConfiguration.RegisterWellKnownServiceType(typeof(PurchaseRem), "IPurchase", WellKnownObjectMode.SingleCall);
//Server_008: Break the Server from Exit
System.Console.WriteLine("Press Any Key to Halt the server");
System.Console.ReadLine();
Note that at tag 007: We registered the Remote object with the name of the interface.
READ MORE >>


0 comments:
Post a Comment