


In the previous article we learned the fundamentals of Isolated Storage and how to write to files in isolated storage using the same classes you use for ordinary file access in a .NET application, such as StreamWriter and BinaryWriter.
So, here in the second of a two-part series of articles, we will learn about the XmlSerializer class, which provides a higher-level alternative that allows you to serialize and deserialize objects rather than write and read individual pieces of data.
How it works:
XmlSerializer works by converting a live object into a stream of bytes, which you can push out to any stream and perform the reverse trick and convert a stream of bytes into an object instance.
How to use it:
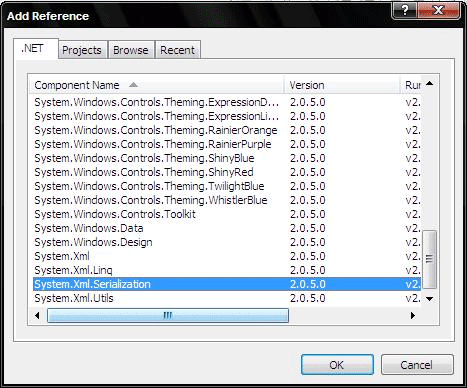
we need to add, System.Xml.Serialization.dll
Advantage with XML Serializer:
XmlSerializer gives you a clean, concise way to store an entire object's worth of information. Ideally, the classes we use to store information with XmlSerializer will be simple data packages with little or no functionality built in.
So let us start programming it to explore more of it.
Step 1: Create a Silverlight application project and name it: XMLSerializerIsolatedStorage
Step 2: In the previous article we were saving the full name of any employee, so we will create a class which will be serialized
public class Employee {
public string Name { get; set; }
public DateTime? DateOfBirth { get; set; }
public Employee(string sName,DateTime? dateOfBirth)
{
Name = sName;
DateOfBirth = dateOfBirth;
}
{
Name = sName;
DateOfBirth = dateOfBirth;
}
// Required for serialization support. public Employee() { } }
Step 3: we will add two namespaces with which we are going to work.
using System.IO.IsolatedStorage;using System.Xml.Serialization;
add assembly reference ;
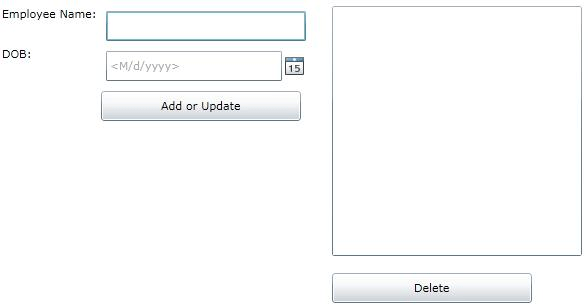
Step 4: Now let us create a XAML to input employee details.
We will have textbox for name and a calendar. The left hand side we will have a listbox to show the details.
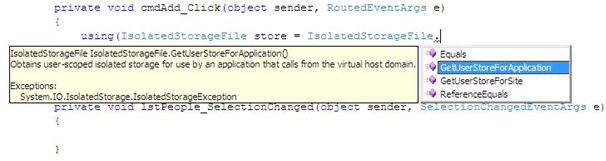
Step 5: Let us write a handler for the add button, listbox selection changed and delete button. Before that we need to create an object of XmlSerializer class of our class type which is Employee
// requires System.Xml.Serialization.dll refrence private XmlSerializer serializer = new XmlSerializer(typeof(Employee));
private Person currentEmployee;
We will create storage object for application scope, you can create it for Site as well.
Here is the add button handler;
Step 3: we will add two namespaces with which we are going to work.
using System.IO.IsolatedStorage;using System.Xml.Serialization;
add assembly reference ;
Step 4: Now let us create a XAML to input employee details.
We will have textbox for name and a calendar. The left hand side we will have a listbox to show the details.
Step 5: Let us write a handler for the add button, listbox selection changed and delete button. Before that we need to create an object of XmlSerializer class of our class type which is Employee
// requires System.Xml.Serialization.dll refrence private XmlSerializer serializer = new XmlSerializer(typeof(Employee));
private Person currentEmployee;
We will create storage object for application scope, you can create it for Site as well.
Here is the add button handler;
READ MORE >>


0 comments:
Post a Comment